ホーム > タグ > greasemonkey
greasemonkey
Google ReaderからFeedlyに移行しました 
- 2013年06月25日
- レビュー
Google Readerが7月1日で終了するため,多くの人がRSSリーダ難民になろうとしています.様々なRSSリーダを試してみましたが,僕が欲しいのは優れたRSSリーダではなく,単なるGoogle Readerクローンなのです.なかなかよいRSSリーダが見つからず,CommaFeedやFeedlyやFeedeenなどを試していましたが,なかなか決定打は出ませんでした.そうこうしていたところ,ついにFeedlyがGoogle Readerから独立してFeedly Cloudを開始しました.さらに,Androidで愛用しているRSSリーダであるgReaderがFeedly Cloudに対応したため,Feedlyへの完全移行を決めました.
Androidで見るときはgReaderを使うのでなにも変化はなく,非常に快適です.問題はPCでの閲覧ですが,stylishやgreasemonkeyを使うことで,概ね満足できるレベルになったので,紹介しようと思います.
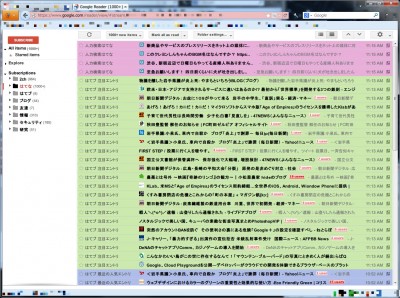
移行前のカスタマイズされたGoogle Reader
移行前のGoogle Readerはこんな感じです.
もう使えなくなるので,個別のスクリプトとかは紹介しませんが,ファビコンを表示してカラフルにしてはてブ数を表示して広告は表示しないようにして,CSSであっちこっちを省スペース化してます.おおよそこんな感じになると,個人的には使い勝手が非常に良いです.移行コストが少ないです.
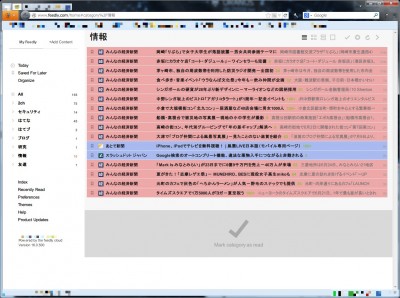
カスタマイズしたFeedly
完全移行してカスタマイズしたFeedlyがこちらです.
見た目からしてもうほとんど同じです.使っているスクリプトなどを紹介しましょう.
- Feedly – Beyond Google Reader :: Add-ons for Firefox
- Feedly Unread Count in Favicon and Title Bar for Greasemonkey
- Readly: make Feedly look like Google Reader for Greasemonkey
- Feedly Colorful Listview for Greasemonkey
- Feedly favicons in articles for Greasemonkey
- Feedly をはてブ対応させるユーザースクリプト
- Feedly Cleaner – Themes and Skins for Feedly – userstyles.org
基本的に,Feedly CloudのWeb版ではなく,アドオン版のFeedlyを使っています.理由は単純で,Facebook,Google+,FeedlyのLike数が表示されるからです.Cloud版だと表示されないんですが・・・表示されますか?されないですよね?あとはそれぞれのuserscriptとuserstylesを入れます.ターゲットがcloud.feedly.comのみになっている場合があるので,アドオン版を使う場合は適宜変更なり追加なりするといいと思います.
まとめ
スムースに移行できました.はてブ数は記事を展開しないと表示されないので見るかどうかの取捨選択に使えなくなってちょっと不便ですが,それでも十分に利用できる環境です.それから,上から順に読んできて,1番下に「Mark as read」があるってのが地味に便利です.いいね!
新しいGoogle Readerとたたかう 
- 2011年11月06日
- ソフトウェア
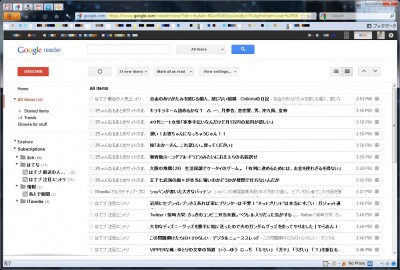
ご存じのように,11月1日くらいからGoogle Readerが新デザインになり,多くの人がぶち切れています.新デザインは以下のような感じです.
モノトーン基調で,見にくいです.無駄なスペースも多く,あほちゃうかと思います.クラウド時代だからって,なんでもかんでもリソースたっぷり使って良いわけではありません.デスクトップサイズは変わらないし,我々人間の処理能力が上がるわけじゃない.というわけで,これをどげんかして,見やすいようにしていきたいと思います.
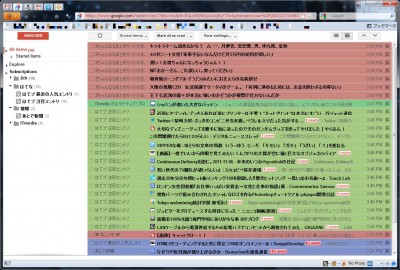
完成形
StylishとGreasemonkeyで調整された,オレ的にベストなGoogle Readerは以下の通りです.
導入しているGreasemonkey
Greasemonkeyに入れているスクリプトは以下の通りです.
- Google Reader Full Feed Mod
- GoogleReader plus Hatena
- Favicon with Google Reader
- Google Reader – Colorful List View
1番最後のColorful List Viewが新デザインになって使えなくなって,2chを含めて世界的に阿鼻叫喚となりました.しかし,作者殿の手早い対応で,復活しましたので,もう安心です.幸せです.完璧です.類似にGoogle Reader: Colorize items based on foldersってのがあります.色が違いますが,これでもいいんじゃないでしょうか.ただ,Favicon with Google Readerが動かなくなるので,修正が必要になります.簡単だけど.それから,Favicon表示に関しては,Google Reader Favicon ++ってのがありますが,どうもこれ,先頭の20アイテムしかアイコンを拾わないので,どうにも使い勝手が悪いです.ですので,僕の環境では上に示した4種類で運用してます.バッチリ.
それから,Google Reader – Colorful List Viewの神待ちスレでは,見た目を旧版っぽくするGoogle Reader Compact Minimal For Small Screenってのが紹介されていますが,これの中身は単なるCSSの適用なので,GMでやる必要はなくて,StylishやuserChrome.cssでやれば良いと思います.
Stylishに導入しているもの
Stylish側では,上記に示したGMスクリプトの中身を書いたものとそれ以外のおまけと2種類入れています.まずは,Google Reader Compact Minimal For Small ScreenをStylishに書くと以下のような感じです.
@namespace url(http://www.w3.org/1999/xhtml);
@-moz-document
url-prefix(https://www.google.com/reader),
url-prefix(https://www.google.co.jp/reader)
{
#top-bar { height:40px !important; background: #fff !important }
#main { background: #fff !important }
#search { padding:8px 0 !important; }
#viewer-header { height:35px !important; }
#lhn-add-subscription-section { height:35px !important; }
#lhn-add-subscription, #viewer-top-controls-container { margin-top:-13px !important; }
#entries { padding:0 !important; }
#title-and-status-holder { padding:0.3ex 0 0 0.5em !important; background: #f6f6ff !important ; margin-right: 0 !important }
.collapsed { line-height:2.5ex !important; padding:2px 0 !important; }
.entry-icons { top:0 !important }
.entry-source-title { top:2px !important }
.entry-secondary { top:2px !important }
.entry-main .entry-original { top:4px !important }
.section-minimize { left: 0px !important }
#overview-selector, #lhn-selectors .selector, .folder .name.name-d-0,
#sub-tree-header { padding-left: 15px !important; }
.folder .folder .folder-toggle { margin-left:13px !important }
.folder .sub-icon, .folder .folder>a>.icon { margin-left:27px !important }
.folder .folder>ul .icon { margin-left:34px !important }
.folder .folder .name-text { max-width:160px !important }
#reading-list-selector .label { display:inline !important }
a { color: #0022aa !important }
#scrollable-sections { border-right: 1px #ebebeb solid !important ; background: transparent !important }
.lhn-section-primary { line-height: normal !important }
#reading-list-unread-count { margin-top: 0 !important }
.lhn-section { line-height: normal !important ; background: transparent !important }
.selectors-footer { margin-bottom: 0 !important ; padding-bottom: 5px !important }
.scroll-tree li { background: transparent !important }
#viewer-header { background: transparent !important }
.card-content {padding-left: 4px !important; border: #ebebeb 1px solid !important; border-width: 1px 1px 0 1px !important ; padding: 3px !important; background: transparent !important; border-radius: 7px 7px 0 0 !important;}
.card-bottom { padding-left: 4px !important; border-radius: 0 0 7px 7px !important }
.card-actions { background: #fcfcfc !important }
.goog-flat-menu-button, #lhn-add-subscription, .goog-button-base-inner-box, .jfk-button { height: 22px !important; line-height: 22px !important }
.goog-button-base-content { padding-top: 3px !important }
.jfk-textinput { height: 20px !important }
.read div.card-content, .read div.card-bottom { padding-left: 3px !important; border-color: #99c !important }
#logo { margin-top: -13px !important }
.card-common { background: transparent !important}
#entries .entry, #entries.list .entry-container { background: transparent !important }
#current-entry .card-content, #current-entry .card-bottom { border-color: #44b !important;}
.card { border-style: none !important }

#top-bar {display: none;}
#gb {display: none;}
#title-and-status-holder {display: none;}
}
どこだか忘れましたが,間違っているところは修正してます.それから,line-heightが2.2exだと狭いので,2.5exにしてます.好みで直せばいいと思う.それからもう1つはたわいもない,以下のコード.
@-moz-document
url-prefix(https://www.google.com/reader),
url-prefix(https://www.google.co.jp/reader) {
#overview-selector, #trends-selector, #your-items-tree-container,
#directory-selector, #friends-tree-container, .s
{display:none !important;}
}
こっちは見直してないけど,なんかいい感じなので,いいんじゃないでしょうか.
まとめ
やっとまともに使えるようになったよ.
Firefox5に移行しました 
- 2011年07月04日
- ソフトウェア
リリースサイクルがとんでもないことになって,Firefox4に移行したのがついこの前なのに,あっという間にFirefox5がでました.リリース日に移行していたのですが,今頃になってなんなんですが,一応書いておきます.雑感としては,今までのメジャーバージョンアップの中では1番移行が簡単でした.アドオンの不具合がほとんどなかったのが幸いしたのでしょう.裏を返せば,バージョン番号がメジャーアップしただけで,実際はマイナーバージョンアップ相当じゃないのか・・・と思ったりもします.以下は,いくつかの問題への対処です.
Greasemonkeyがおかしい
Firefox4になってから,LDRizeなどが動かない問題が顕在化し,長いことこのパッチを当てたGreasemonkey 0.9.1を使ってきたのですが,Firefox5ではAutopagerizeなどが正しく動かなくなり,げんなりとしました.調べてみると,現時点での最新版は0.9.5で同じパッチをすればいいらしいので,パッチ済0.9.5をインストールすることで,Autopagerizeなどの動作は正常化しました.問題なし.
未対応のアドオン
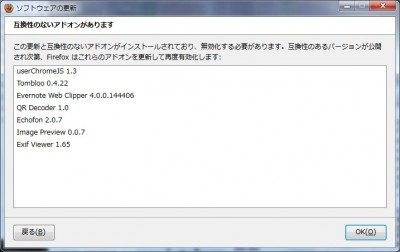
いくつかのアドオンがバージョンチェックではねられました.
Firefox4の頃から未対応だったものも含まれてますが,いつも通りにabout:configにextensions.checkCompatibility.5.0を作成して,falseにすればオッケーです.バージョンチェックで動かないものは全部これで対応できました.問題なし.
タブバーの高さがおかしい
タブバーの高さがなんだかおかしくなりました.そのため,userChrome.cssかstylishで調整する必要があります.採用したのは以下のコード.
/* Firefox 5 用 タブの高さ 5 */
.tabbrowser-tab,
.tabs-newtab-button {
padding: 0px 0 1px !important;
}
Firefox 5 タブの高さを低く調整する方法 :: Firefox Fan Club + More Browsers
簡単ね!
カスタマイズしたFirefox5
いつも通りにカスタマイズされたFirefox5です.
フルスクリーンモードではないFull HD(1920*1080)環境で,ウィンドウサイズ1918*939を実現しています.表示領域は極限まで広く.
まとめ
ちゃんと動けば快適です.Greasemonkey問題はちょっとどうにかして欲しいです.
Firefox3からFirefox4への移行 
- 2011年03月27日
- ソフトウェア
先日,待望のFirefox4が登場しました.主な変更点としてはHTML5対応,Jaeger MonkeyによるJavaScriptの高速化などがあげられると思います.革新的なUIは別にどうでもいいです.そんなFirefox4はbeta12あたりからちらちらと確認はしていましたが,アドオンが正式対応ではなかったので,移行はしていませんでした.このたび,どうやら大半のアドオンが対応し,移行しても問題ない状況になったようなので,勢い勇んでFirefox3からFirefox4へ移行しました.ただし,アップグレードではUIがおかしくなった(カスタマイズしすぎている所為だと思うけどどれが原因か特定できなかった)ので,新規のFirefox4を入れて,環境を再構築しました.なお,導入したのは,普通のFirefox4ではなく,Firefox4のPortable Editionです.環境が固まったら,ディレクトリごと丸々コピーで職場も自宅も安心ね!
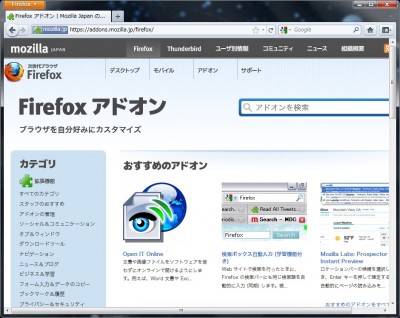
まっさらなFirefox4
何もカスタマイズしていないまっさらなFirefox4はこのような感じです.良く覚えておいて下さい.これが原形をとどめないくらいにカスタマイズされちゃいますから!
アドオン
まずは,何はなくとも素のFirefoxなんて使えませんので,アドオンを投入しまくります.
- All-in-One Sidebar
- Anti-Aliasing Tuner
- Better Gmail
- Echofon
- Evernote Web Clipper
- Exif Viewer
- Gmail S/MIME
- Greasemonkey
- Hatena Bookmark
- InformEnter
- Movable Firefox Button
- OptimizeGoogle
- Organize Status Bar (Firefox4未対応)
- Pearl Crescent Page Saver Basic
- Proxy Selector
- Secure Login
- Stylish
- Tab Mix Plus
- Tombloo
- userChromeJS
Tomblooは最新の0.4.22を入れてます.GreasemonkeyはFirefox4対応が0.9.1になっているので,渋々0.9.1を導入しました.これは後述します.Proxy Selectorはなんでも良かったのですが,1番最初に目に付いたので.userChromeJSはv1.3がFirefox4対応になっています.これも後述します.Organize Status BarはFirefox4未対応になっているので,互換性チェックを回避して動かしています.方法は以下の通り.
379 名前:名無しさん@涙目です。(神奈川県)[sage] 投稿日:2011/03/23(水) 02:00:32.47 ID:vMmsrVAf0
about:configでextensions.checkCompatibility.4.0をつくってfalseにすればアドオン入れなくても
過去のアドオンほとんど使える
なお,Sxipperは互換性チェックを回避しても動きません.困りましたね.
userChromeJS
userChromeJSは強力なカスタマイズ環境を提供します.これが使えると,アドオンを入れなくても色々なことができます.導入しているスクリプトは以下の通り.
- Sub-Script/Overlay Loader
- context-encoding-menu.uc.js
- CopyURLLite.uc.js
- launchClipboard3.uc.js
- LaunchIE.uc.js
- MouseGestures2.uc.js
- rebuild_userChrome.uc.xul
- SelectSearchInTextArea.uc.js
- textLink.uc.js
- UserAgentSwitcherLite.uc.js
うーん.リンク切れで見つからないスクリプトがありますね・・・.大事に保存していかなければ.LaunchIE.uc.jsはIE viewと同等の機能を持つものです.MouseGesture2.uc.jsはいわゆるマウスジェスチャーです.必要なら声をかけて頂ければ.
Stylish
cssで見た目などを大きく変更することが可能になるStylishです.userchrome.cssも同じ役割ですが,まぁその辺は深く考えずに・・・.
- Awesome Bar Background Color Based on Type (WOW)
- FF4 – Increase visible space via
- Firefox 4 – Compact Addon Manager
- Firefox 4 – Transparent Navbar buttons
- Firefox 4 Add-ons Manager Lite
- Firefox 4 Hide Addonbar Close Button
- Firefox 4 Lock Icon for Secure Sites
- Gmail without ads
- Google Reader Min
- Google Reader メニュー消し
- https-location-bar-yellow
- Icon identifiers for links redux
- mixi-adjust
Google Reader メニュー消しはたぶんオリジナルです.以下のようなコードです.
@-moz-document url-prefix(https://www.google.com/reader),
url-prefix(https://www.google.co.jp/reader),
url-prefix(http://www.google.com/reader) {
#overview-selector,??????? /*ホーム*/
#trends-selector,????????? /*トレンド*/
#your-items-tree-container,/*コンテンツ*/
#directory-selector,
#friends-tree-container,?? /*友だちの共有アイテム*/
.s                         /*スペーサ*/
{display:none !important;}
}
userchrome.css
うーん.よく考えるとuserchrome.cssに書かなくてもStylishに書けばいいような気もしますが,絶対的に適用させたいので,ここに書いておきましょう.書いたのはメニューバーを移動させた後の微調整として,これの6番を書いてあります.
#main-window[sizemode=normal][tabsontop]
#appmenu-button-container {
  position: fixed !important;
  z-index: 2 !important;
}
#main-window[sizemode=normal][tabsontop]
#toolbar-menubar[autohide="true"]{
  margin-top:-14px;
  -moz-padding-start:70px!important;
  margin-left:-100px !important;
}
#main-window[sizemode=normal]
#navigator-toolbox[tabsontop] > #toolbar-menubar[autohide] ~ #TabsToolbar {
  -moz-padding-start:85px!important;
  -moz-padding-end:110px!important;
  margin-left:-85px !important;
}
Greasemonkey
さて,ここがFirefox4最大の難関でした.主にはFirefox4対応のGreasemonkey0.9.1がやっかいで,いくつかのGreasemonkeyスクリプトが動かなくなっています.その問題を解決する手段がありますので,後述します.まずは,導入しているスクリプトは以下の通り.
- addresslink
- AutoPagerize
- Deny Rakuten Mail
- Deny Rakuten News
- Favicon with Google Reader
- Google Docs Download
- Google Reader – Colorful List View
- Google Reader Auto Read Ads
- Google Reader Fill Feed Mod
- Google Reader Prefetch More
- GoogleReader plus Hatena
- hb: highlight mytags
- Japanese Popular SBM Count With Google
- LDRize
- Minibuffer
- Popup Alt
- ReblogCommand
- Short URL Explander
- Youtube Auto Buffer & Auto HD & Remove Ads
- Youtube HD Suite
ここで,Greasemonkey0.9.1上では,MinibufferとLDRizeが正しく機能しないはずです.そこで,対策パッチを当てます.Greasemonkey0.9.1にパッチを当てます.常識なので知っていると思いますが,xpiファイルは単なるzipファイルですので,greasemonkey-0.9.1-fx.xpiをダウンロードして,それを拡張子を変えるなりなんなりして,とにかく解凍します.解凍されたフォルダ内のcomponents/greasemonkey.jsを以下のように修正します.
--- a/components/greasemonkey.js
+++ b/components/greasemonkey.js
@@ -255,6 +255,9 @@ GM_GreasemonkeyService.prototype = {
     var xmlhttpRequester;
     var resources;
     var unsafeContentWin = wrappedContentWin.wrappedJSObject;
+    var sharedWindow = {};
+    sharedWindow.window = sharedWindow;
+    sharedWindow.__proto__ = new XPCNativeWrapper(unsafeContentWin);

     // detect and grab reference to firebug console and context, if it exists
     var firebugConsole = this.getFirebugConsole(unsafeContentWin, chromeWin);
@@ -297,6 +300,7 @@ GM_GreasemonkeyService.prototype = {
                                                 "registerMenuCommand",
                                                 unsafeContentWin);

+      sandbox.window = sharedWindow;
       // Re-wrap the window before assigning it to the sandbox.__proto__
       // This is a workaround for a bug in which the Security Manager
       // vetoes the use of eval.
Firefox 4.0b10でGreasemonkey 0.9.1のユーザスクリプトのwindowを共通にする改造(開発者orVimper向け) – wltの日記
修正したら,全ファイルとフォルダを選択し,zipで圧縮します.ここで,上位階層のフォルダを圧縮してもダメです.カレントフォルダにファイルが置いてある階層で圧縮して下さい.出来上がったら拡張子をxpiに変更して余裕です.簡単です.
続いて,Minibufferを修正しましょう.Minibufferの2009.12.06版に対して,以下のパッチを当てます.
@@ -815,7 +815,7 @@
 // http://userscripts.org/scripts/show/11996
 // slightly modified.
 var FlashMessage = new function(){
-       GM_addStyle(<><![CDATA[
+       GM_addStyle((<><![CDATA[
                #FLASH_MESSAGE{
                        position : fixed;
                        font-size : 500%;
@@ -833,7 +833,7 @@
                        min-width : 1em;
                        text-align : center;
                }
-       ]]></>)
+       ]]></>).toString());
        var opacity = 0.9;
        var flash = $N('div',{id:'FLASH_MESSAGE'});
        hide(flash);
これで完璧です.
201103291243追記:
pしたものがoで複数開けない問題(主にgoogleなど)は以下のパッチで余裕の模様.オリジナルのMinibufferは2009.12.06版.
--- 11759.user.js       Tue Mar 29 12:42:48 2011
+++ 11759_2.user.js     Tue Mar 29 12:44:37 2011
@@ -1645,7 +1645,7 @@
        if(target){
                window.open(url, target);
        }else{
-               GM_openInTab(url);
+               window.open(url);
        }
 });
 return stdin;
Commit dab8e5a44a71eba69630d08499ebc52d51b1fcf4 to swirhen/config – GitHub via Firefox 4時代のVimperator – retletのvimperator – vimperatorグループ
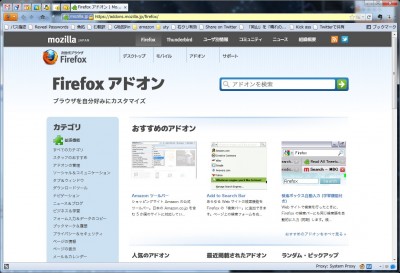
フルカスタマイズされたFirefox4
そしてフルカスタマイズされてしまったFirefox4はこんな感じです.
関連
- Mozilla Re-Mix: Firefox 4の細部をカスタマイズできるユーザースタイルあれこれ。
- 『Firefox 4』のインターフェイスにまつわる7つのイライラとその修正方法 : ライフハッカー[日本版]
- Firefox 4.0b10でGreasemonkey 0.9.1のユーザスクリプトのwindowを共通にする改造(開発者orVimper向け) – wltの日記
- Firefox 4.0b8~b9 でLDRize (Minibufferの修正) – wltの日記
- Firefox 4.0 のプロファイルを再構成してみた ( Firefox4.0 + userChromeJS1.3 + Sub-Script/Overlay Loader v3.0.30mod + α) – Oda’s Memorandum ~おだめも~
- Firefox 4 + userChromeJS v1.3で基本性能をアップさせる – GeekなNooblog
Home > タグ > greasemonkey
